Adding FlashLocks and Fobs

| To add a FlashLock, select FlashLocks from the Locks menu. This will bring up the FlashLock listing page. |
|
Click  from the toolbar to
add a new record. from the toolbar to
add a new record.
|
|
|
|
|
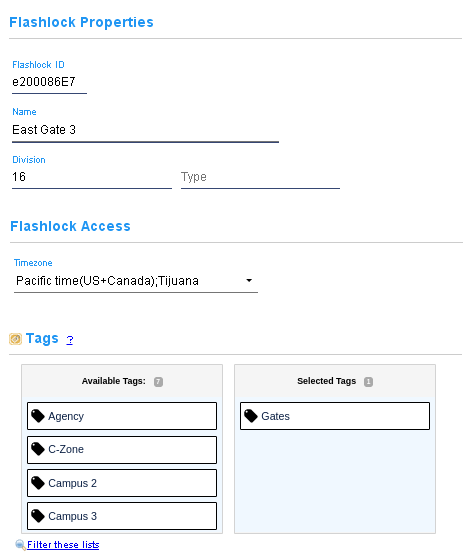
Enter the serial number of the FlashLock and give it a name. The option Lock will beep twice when access is granted to a flash pattern only appears for FlashLocks which are not padlocks (part number FL-PL). FlashLock padlocks have serial numbers beginning with 'e20'. FlashLocks have a clock for recording flash access events. A a timezone offset is needed when access is limited to the time frames of a schedule. Assiging lock tags to the FlashLock at this time will ensure the FlashLock will be programmed with the access codes required by fobs and CyberKey Flash that have permissions to access those tags. |
|
Click  to save the new FlashLock
record. Then follow the instructions to
program the FlashLock. to save the new FlashLock
record. Then follow the instructions to
program the FlashLock.
|
|

| To add a fob, select Fobs from the Keys menu. This will bring up the Fobs listing page. |
|
|
Click from the toolbar to
add a new record.
|
|
|
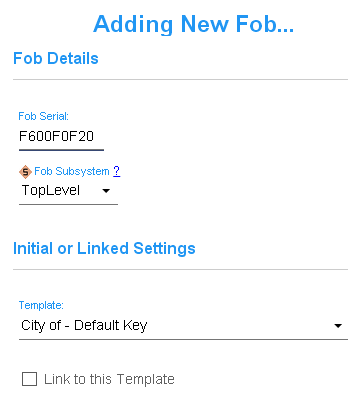
Enter the serial number of the fob and give it a name. If desired, change the subsystem for the fob. Finally, a key template may be chosen for either the fob's initial or linked settings to set its expiration rules . |
|
Click to save the new fob
record. Then follow the instructions to
program the fob.
|
|
![]() Adding FlashLocks and Fobs using Portable Links
Adding FlashLocks and Fobs using Portable Links
|
FlashLocks and Fobs may be added to the CyberAudit-Web system using one of the FlashLock Assistant apps.
Fobs can also be added with either the CyberLink 2 Windows program or the CyberAudit-Link mobile apps. |
|
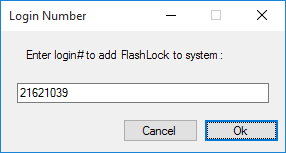
| New, unprogrammed FlashLocks and fobs may simply be presented to portable link.
The server will return an unknown device response, which will cause the app to prompt for
a login number. This identifies who is
adding the FlashLock or fob, verifies whether they have the required permissions, and which
administrator nodes will have
visibility. FlashLocks and unknown fobs are not added to the system when presented. Instead, the portable link will show an error. To move a FlashLock from one system to another, the FlashLock must be reset and programmed to remove all access codes. |
|
Additional links
