Adding a Vault 20S to a CyberAudit-Web System
A Vault 20S is added to a CyberAudit-Web System in three steps:
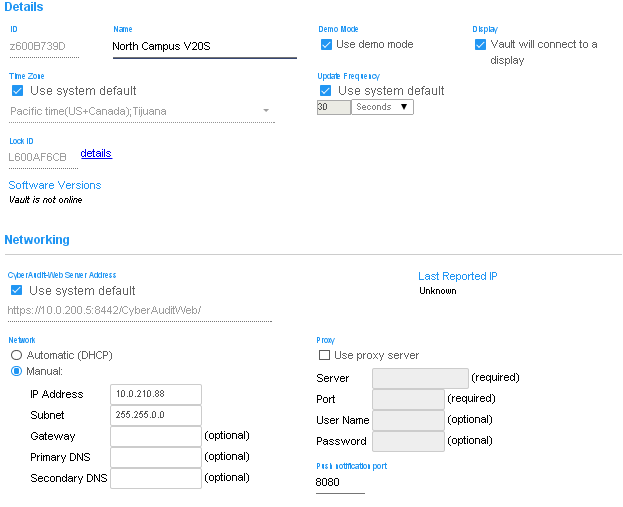
- Enter the Serial number and network settings of the Vault 20S into CyberAudit-Web
- Log in to its manage web site
- Configure the Vault 20S to connect to the correct CyberAudit-Web server URL and account
Add the Vault 20S to CyberAudit-Web
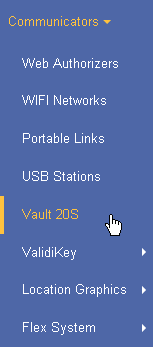
| From the Communicators menu, open the Vault 20S list page. |
 |
Click  from the
toolbar to add a new Vault 20S. from the
toolbar to add a new Vault 20S. |
 |
|
|
In the Add new Vault 20S page,
|
|
|
|
|
|
Connect the Vault 20S to power. Allow about 60 seconds for it to start up. The vault will emit two short beeps from its RFID reader when it is fully started.
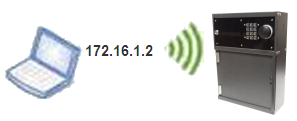
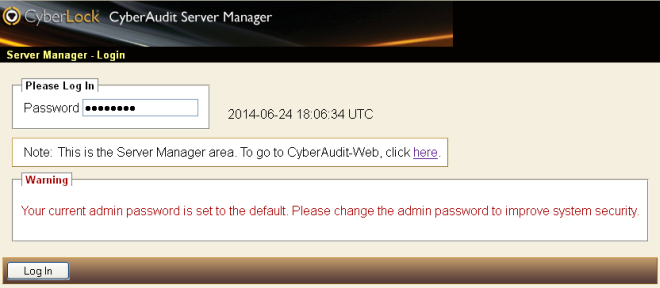
| Log in to the Vault 20S via its WiFi ConnectionThe Vault 20S comes with a USB wireless adapter from the factory. It creates an adhoc wireless network named V20S-<Serial #>. It will serve IP addresses in the 172.16.x.x range. To log in to the Vault 20S Manage site, connect to the vault's wireless network and open a browser to the address 172.16.1.2. |
 |
--OR--
| Log in to the Vault 20S via its wired Ethernet port
The Vault 20S Ethernet port is configured by default to use DHCP to obtain
an IP address. It may be changed to a static IP address by editing the proserver.ini file found on the
USB drive in the Vault 20S accessories. Open proserver.ini using a text editor like workpad. Find the [Network eth0] sections. The first section is a description of the settings. Change the settings in the second section, [network eth0] to the values needed to connect to the network. Remove the ";" (semi-colon) from the beginning of each line needed. |
[network eth0] ;dhcp: on ;address:172.16.0.1 ;netmask:255.255.255.0 ;gateway: ;dns1_1: ;dns1_2: |
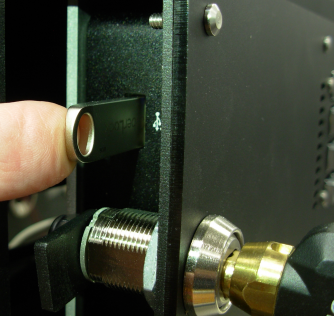
| Save the edited file, unmount the USB drive from the computer, and open the keypad/card reader panel on the Vault 20S. Connect an Ethernet cable Insert the USB drive with the updated proserver.ini file. |
|
| Allow about 20 seconds for the computer to read the USB drive. Then remove the drive and close the panel. | |
| Configure the Vault 20S to connect to CyberAudit-Web | |
|
|
| When connected, the browser will show the Server Manager Login page for the Vault 20S. Enter the password to login. By default, the password is TopLevel. | |
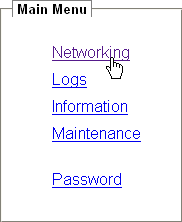
| After logging in, click on the Networking link. |
 |
|
|
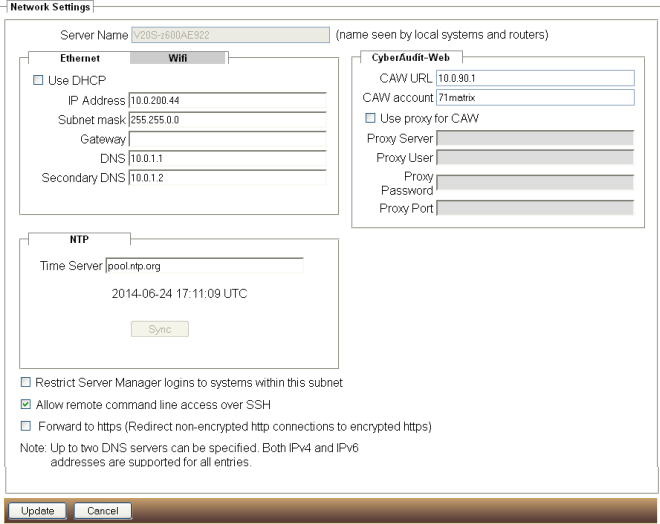
| Fill in the URL and Account to the CyberAudit-Web server. If
access to CyberAudit-Web requires a proxy server, check the box on and enter that info also. It is important for the V20S clock to be accurate to program keys and record activity with the correct time. To maintain accurate time, the V20S updates its clock periodically from an NTP server. By default it uses NTP servers at pool.ntp.org. If that URL is not accessible, enter a URL for an available NTP server. |
|
| Click Update. After networking restarts the login page will appear. |
 |
When the Vault has successfully connected it will appear in the
Vault 20S list page with a
 icon. icon.
|
|
| Other important setup steps | |
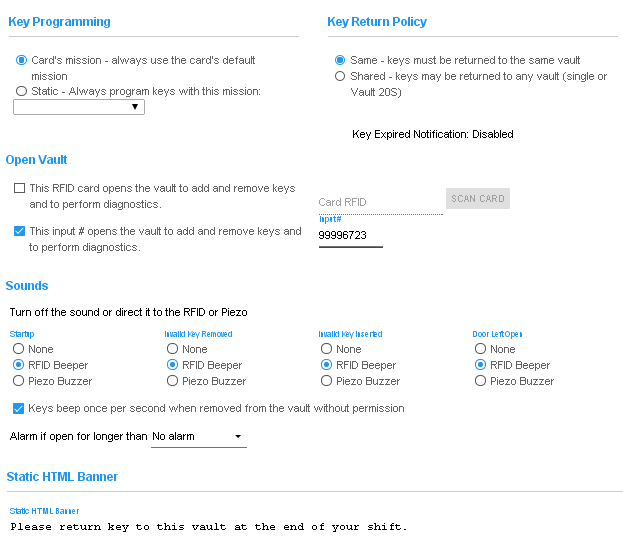
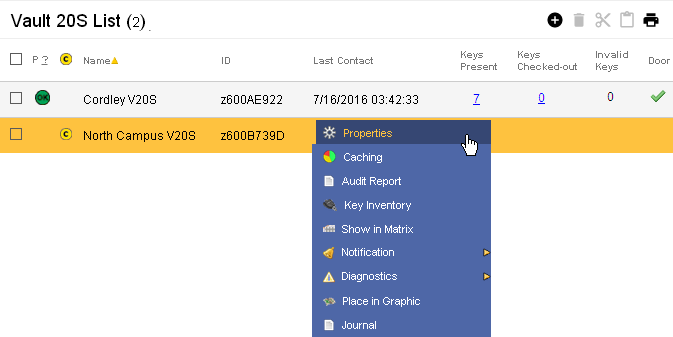
| Set up an RFID access card and/or keypad input digits to enable Vault 20S Manage mode - This is done from the Vault 20S properties page. Select Properties from the vault's record in the Vault 20S list. Find the manage section. Add the RFID access card and/or input digits and click Save. | |

|
|
| Determine a key return policy - The Vault will only issue valid CyberKeys. If CyberKeys may be shared among two or more vaults, use the Shared key return policy set in the Vault 20S Properties page. |

|
| Use manage mode to add keys. | |
| Understand and decide all other settings in the V20S properties page. | |

