 Setting up Azure AD for a CyberAudit-Web Connection
Azure Active Directory (Azure AD) is Microsoft’s enterprise cloud-based identity and access management (IAM) solution. Azure AD is the backbone of the Office 365 system, and it can sync with on-premise Active Directory and provide authentication to other cloud-based systems via OAuth. The Azure AD login portal can be accessed here: Azure AD login portal
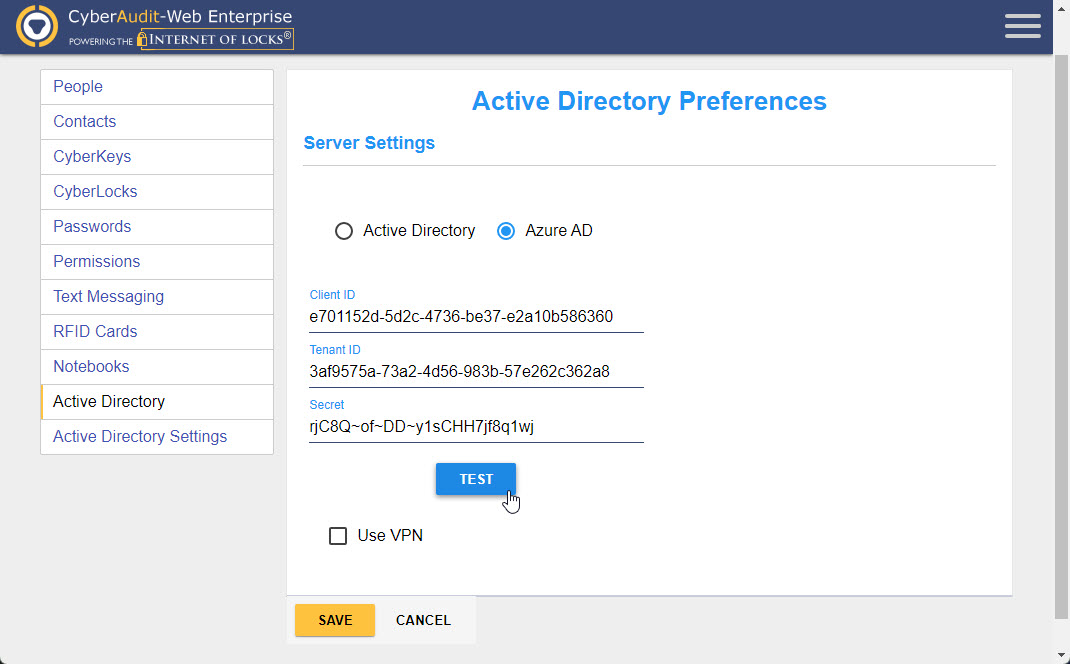
To enable Azure AD integration from within CyberAudit-Web, you will be required to enter a Client ID, Tenant ID, and Secret. How to acquire all three of these items will be discussed in further detail below.
Tenant ID
-
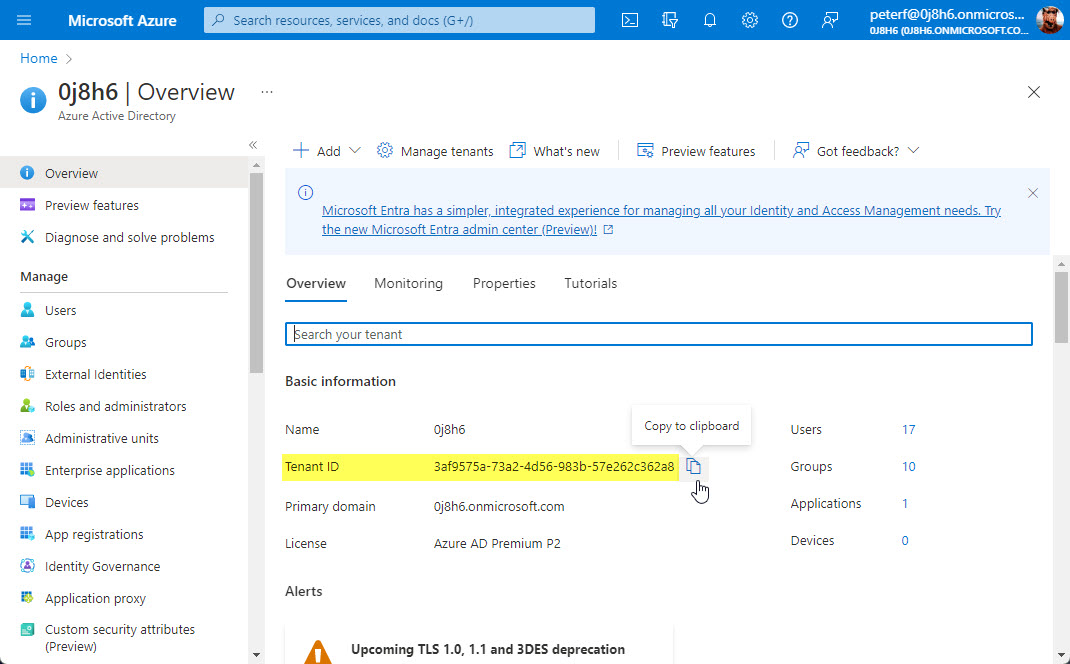
The Tenant ID can be found on the "Overview" page for the Azure AD portal.
Each tenant may have its own ID. Be sure you're looking at the right tenant.
Client ID
-
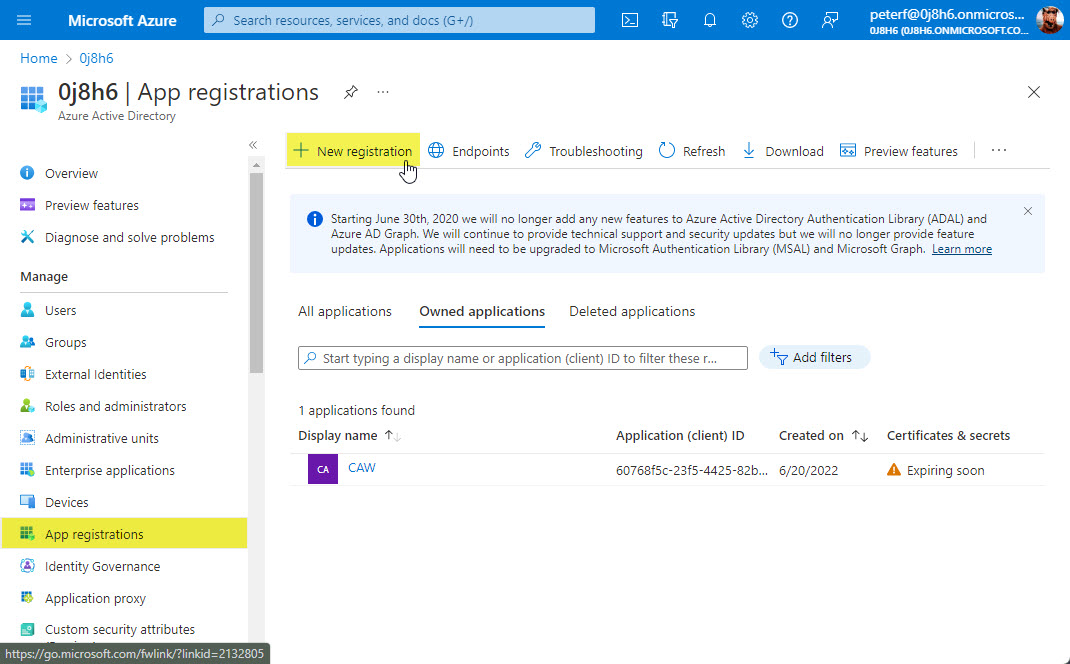
To get Client ID you must first add a new "App Registration" from the Azure AD portal.
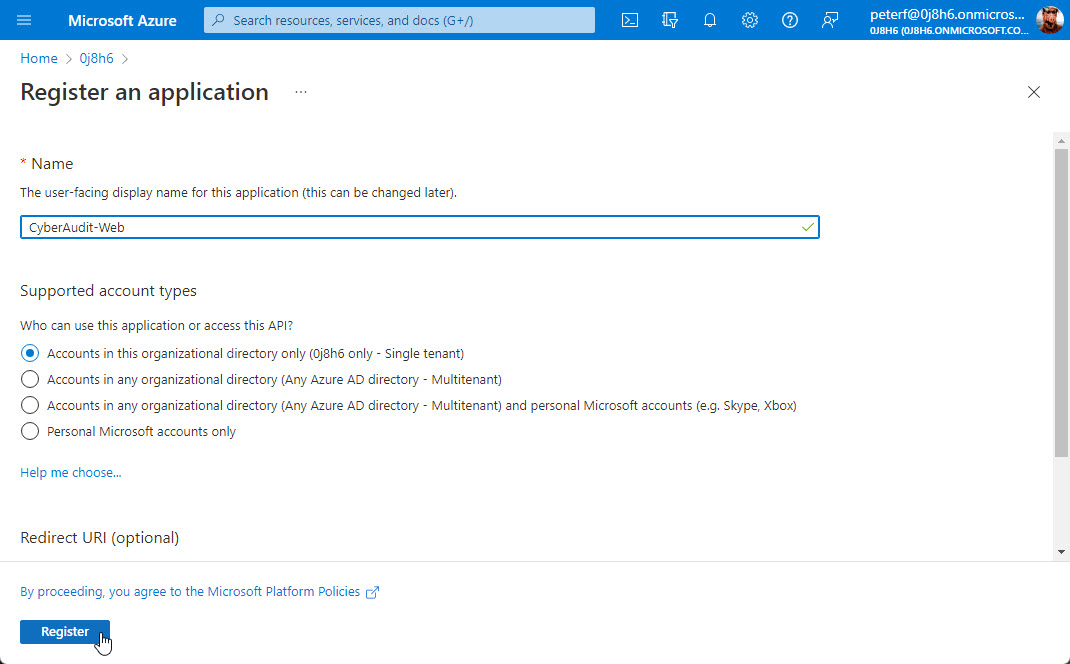
Enter a display name for the application and choose the supported account types. In the screenshot below the "Single tenant" option was selected, but it may be reasonable to select one of the other multitenant options under certain scenarios.
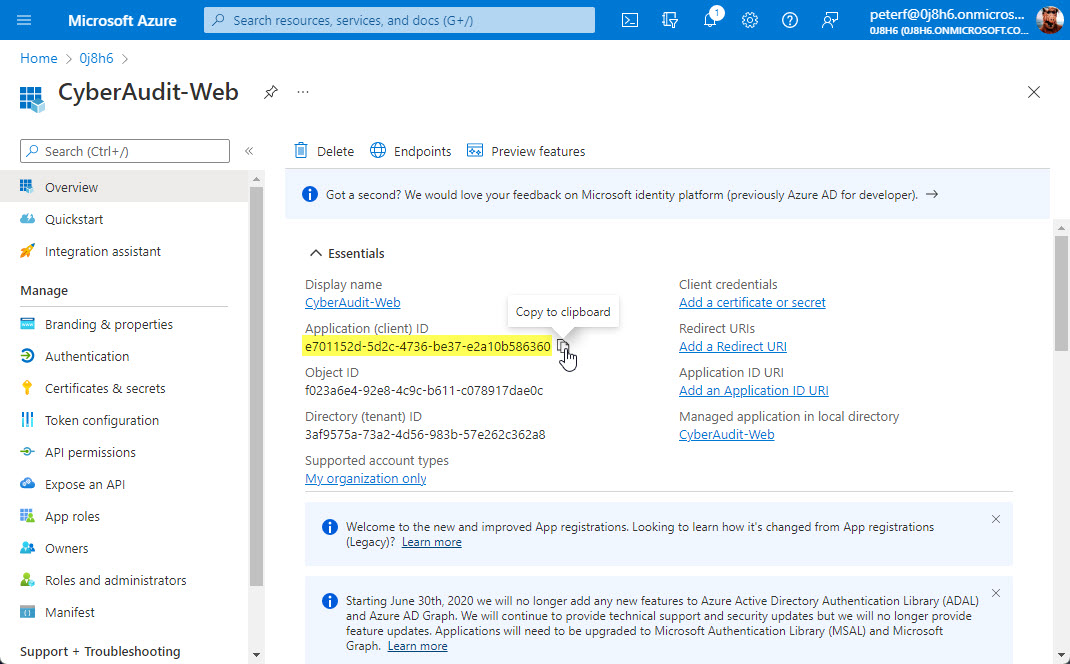
Once the new app registration has been added, you'll find the Application or "client" ID on the "Overview" section.
Secret
-
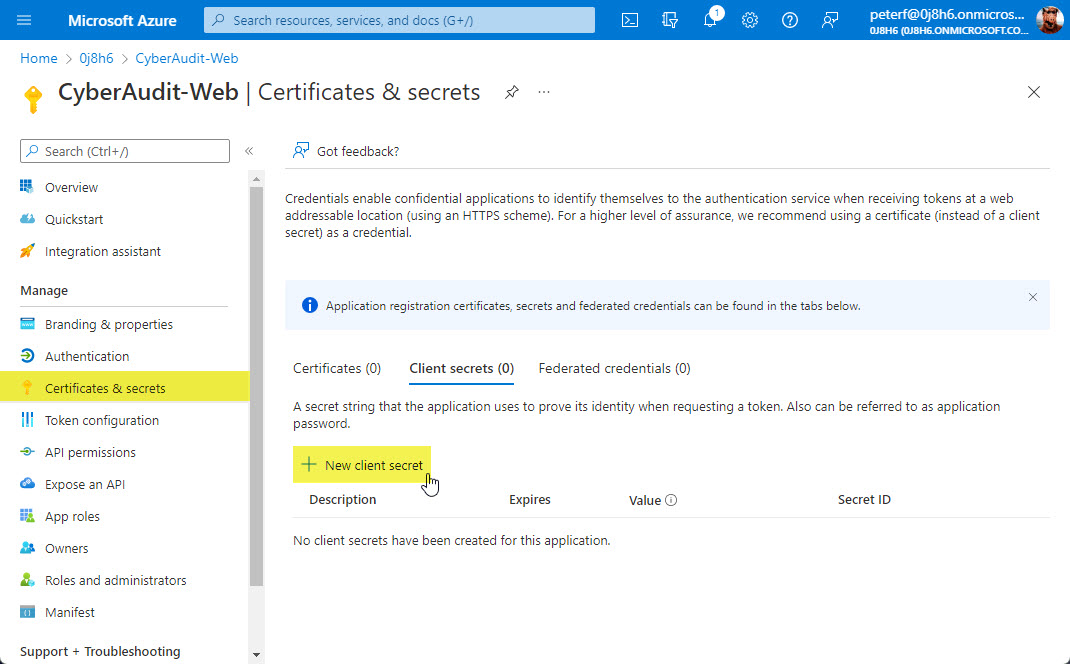
To get the Secret go to the app registration you created for the Client ID above,
and then go to the "Certificates & secrets" section. Then, click the
"New client secret" option to create a new secret
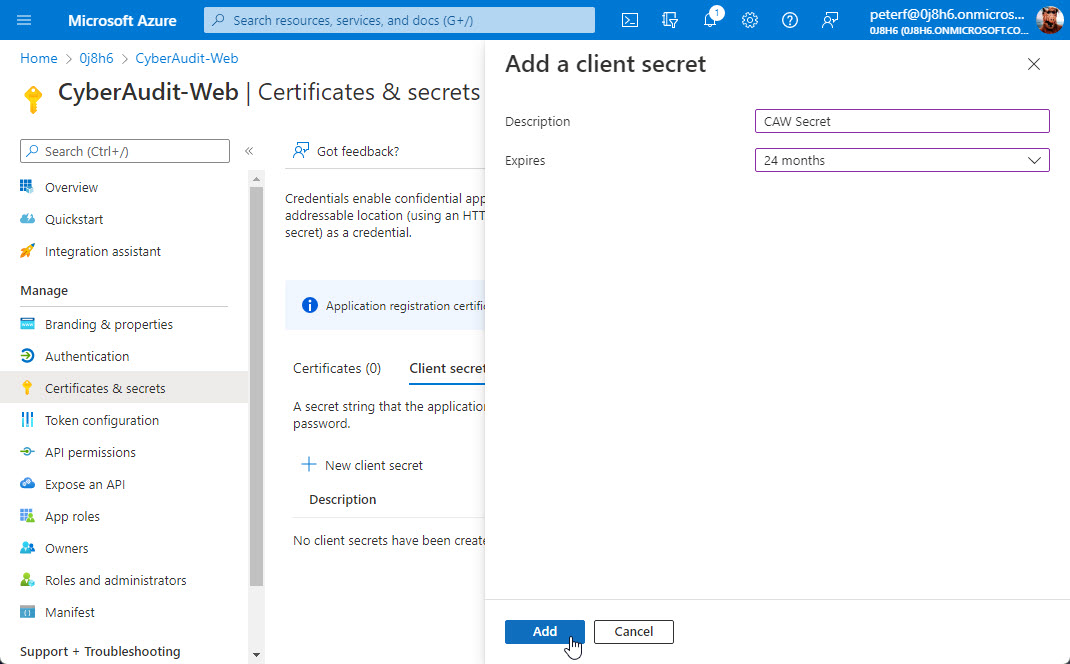
Enter a description for the secret and choose when it expires. At the time of this writing, expiration may be set to a maximum of two years from the creation date.
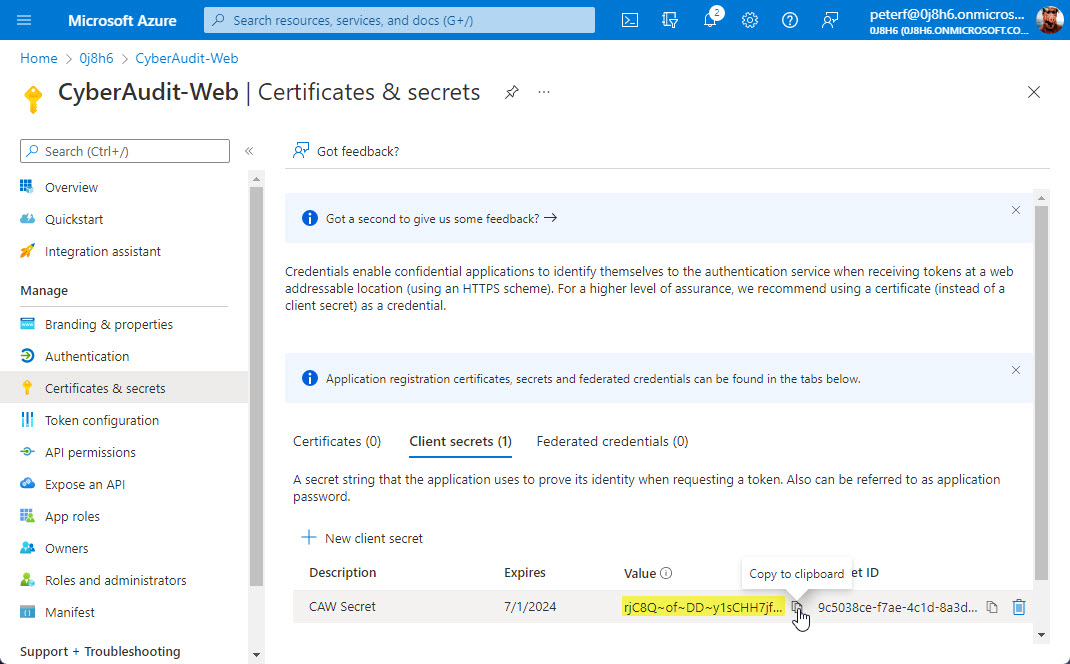
After creating the new client secret, note the "Value" field. This is goes into the Secret field in the Azure AD setup page CyberAudit-Web.
Important! Make sure to copy the secret value when creating the new client secret because it will be hidden the next time you visit this page.
Authentication
-
In order for CAW administrators to authenticate
using their Azure AD credentials, you must add an appropriate redirect URI for the
application created when generating the Client ID.
From the app registration details page go to the "Authentication" section and click the "Add a platform" option.
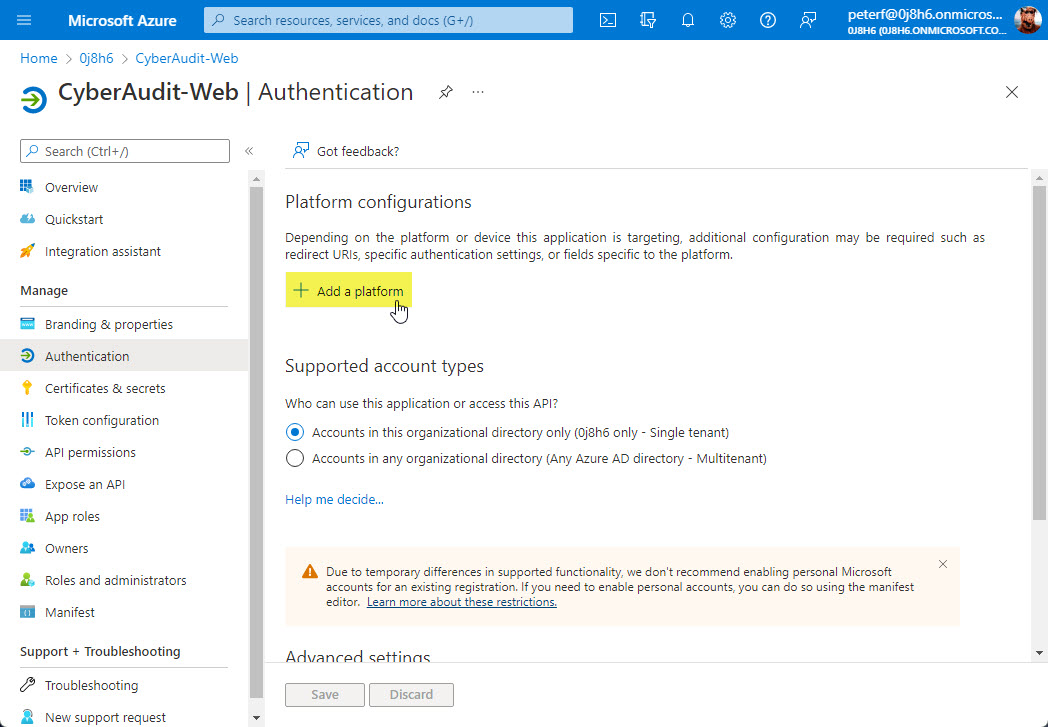
Choose "Web" for the platform type.

Enable the "ID tokens" checkbox at the bottom and then enter the Redirect URI in the following nomenclature:
https://my-server-address/CyberAuditWeb/azure_auth/AzureSecureLogin.act
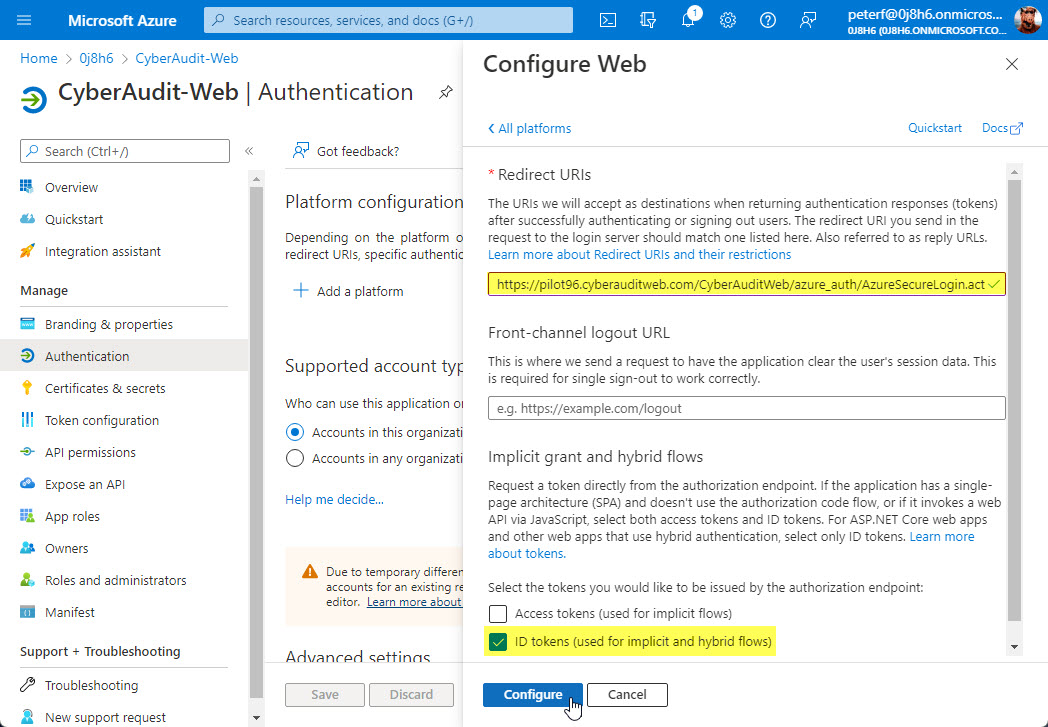
Click the "Configure" button to complete the authentication setup.
API Permissions
-
You must now configure your new app registration with the appropriate
API permissions to grant CyberAudit-Web access to pull the data it requires.
From the app registration details page go to the "API permmissions" section and click "Add a platform".
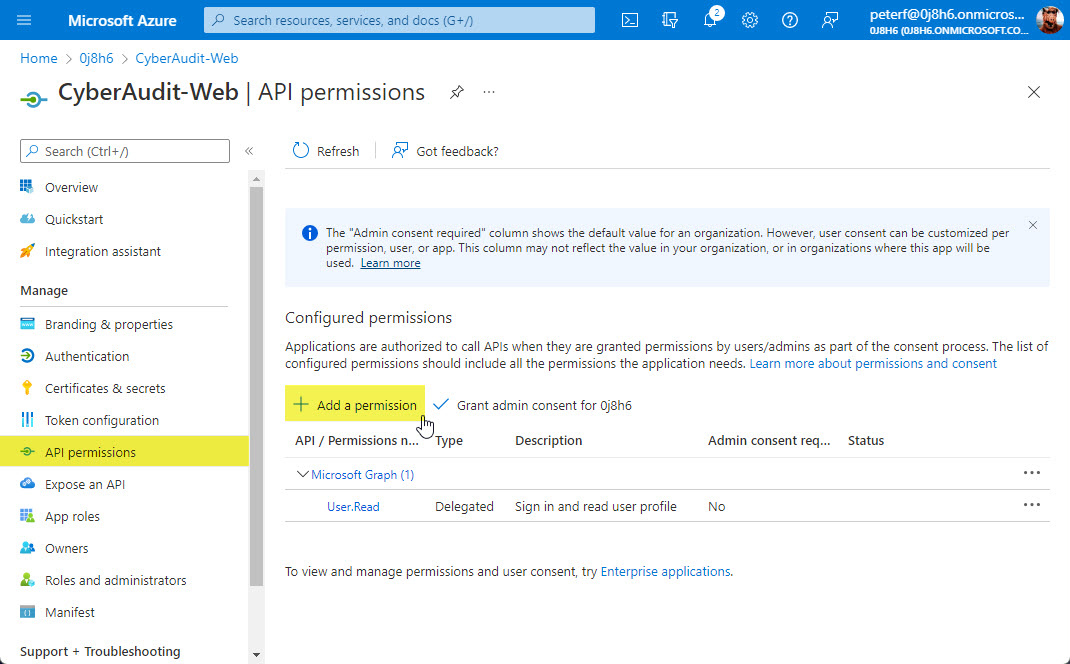
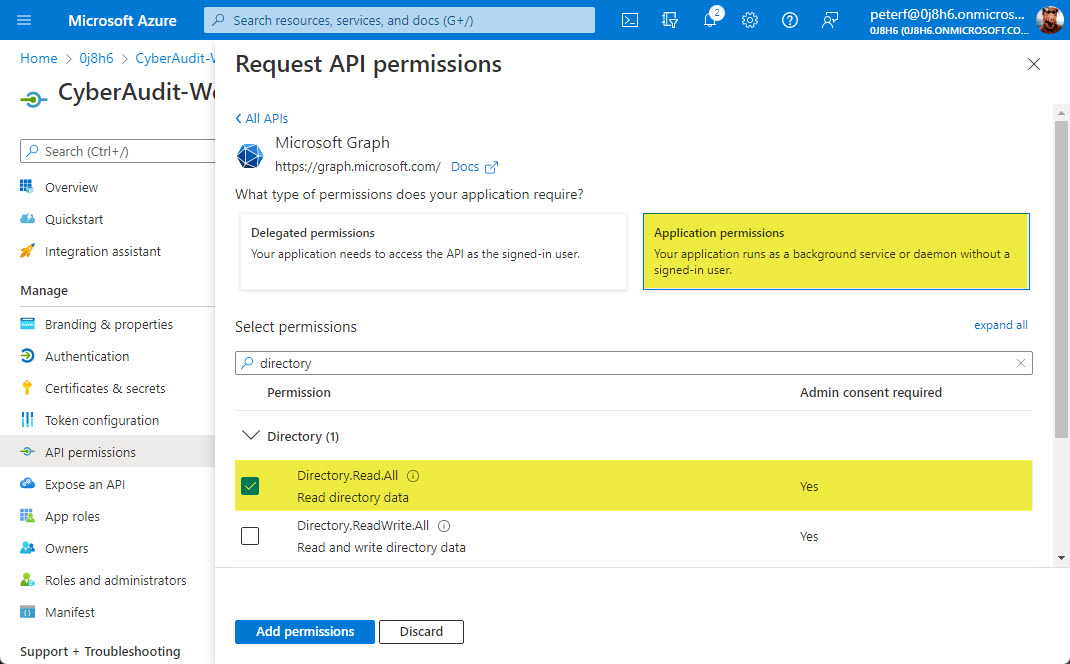
CyberAudit-Web uses the Microsoft Graph API. Click the "Microsoft Graph" option.
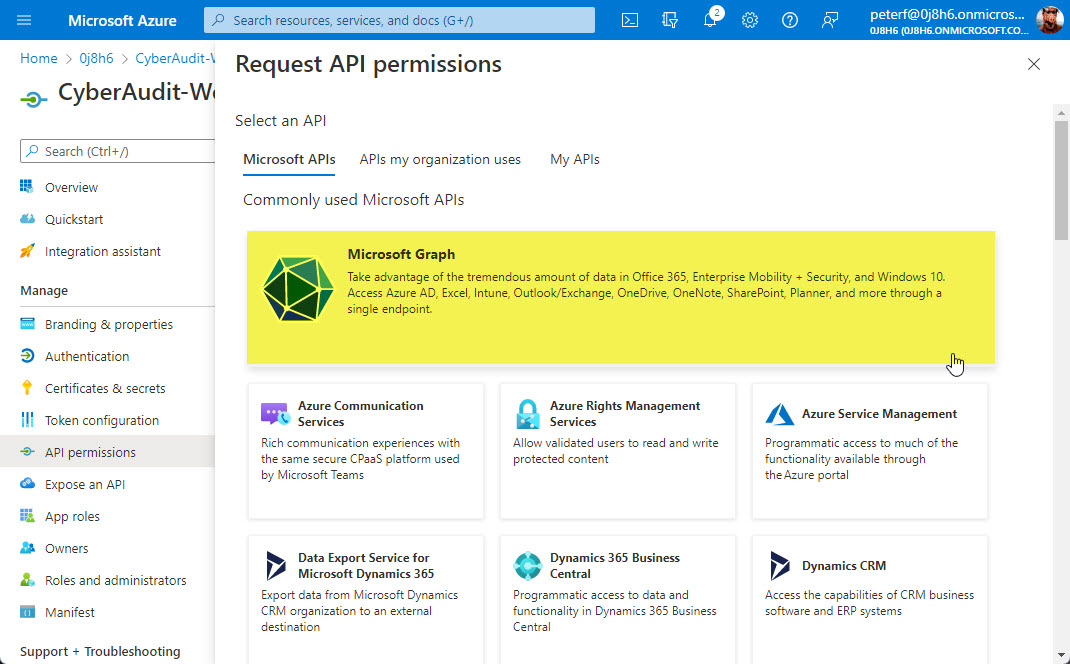
Choose "Application permission" and then find and enable the "Directory.Read.All" permission.
Find and enable the "Group.Read.All" permission and click "Add permissions".
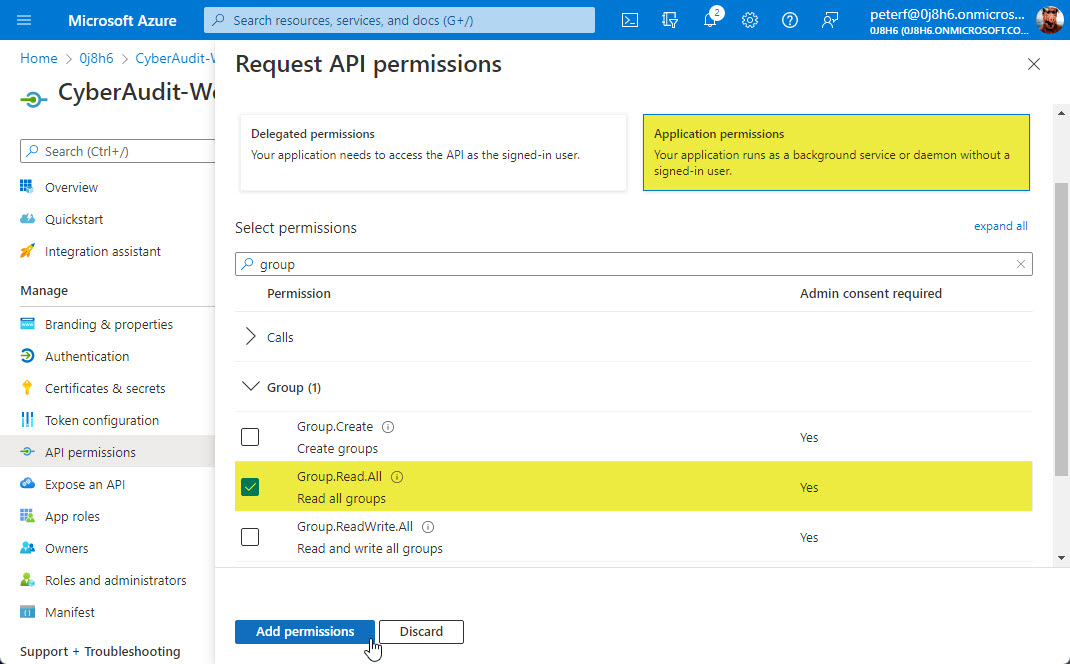
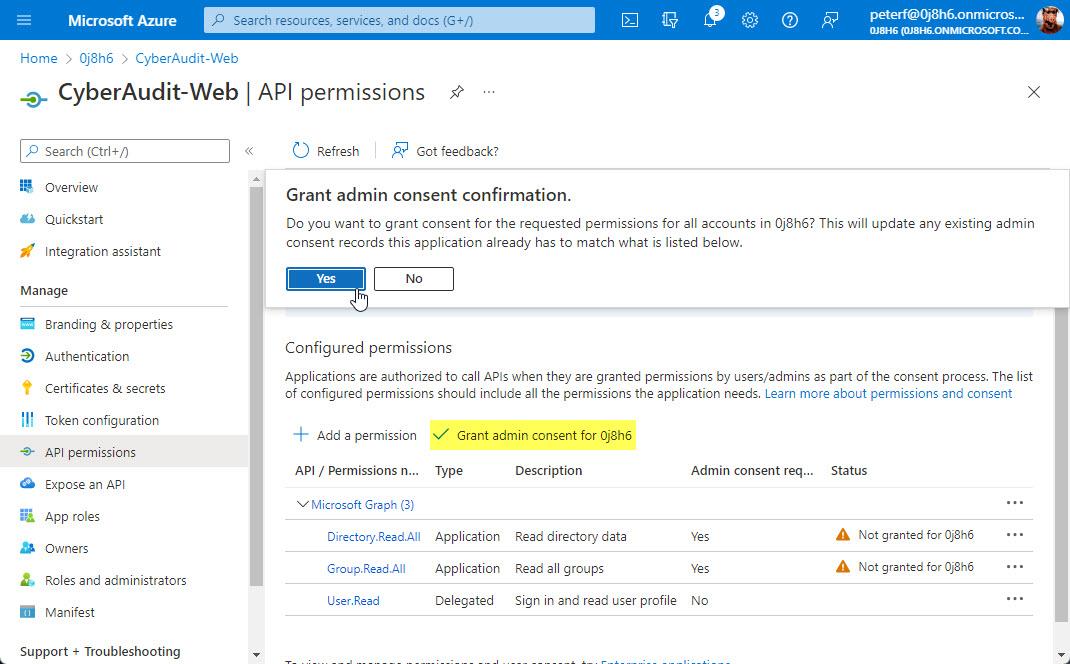
With these two new permissions added, click the "Grant admin consent" option and confirm.
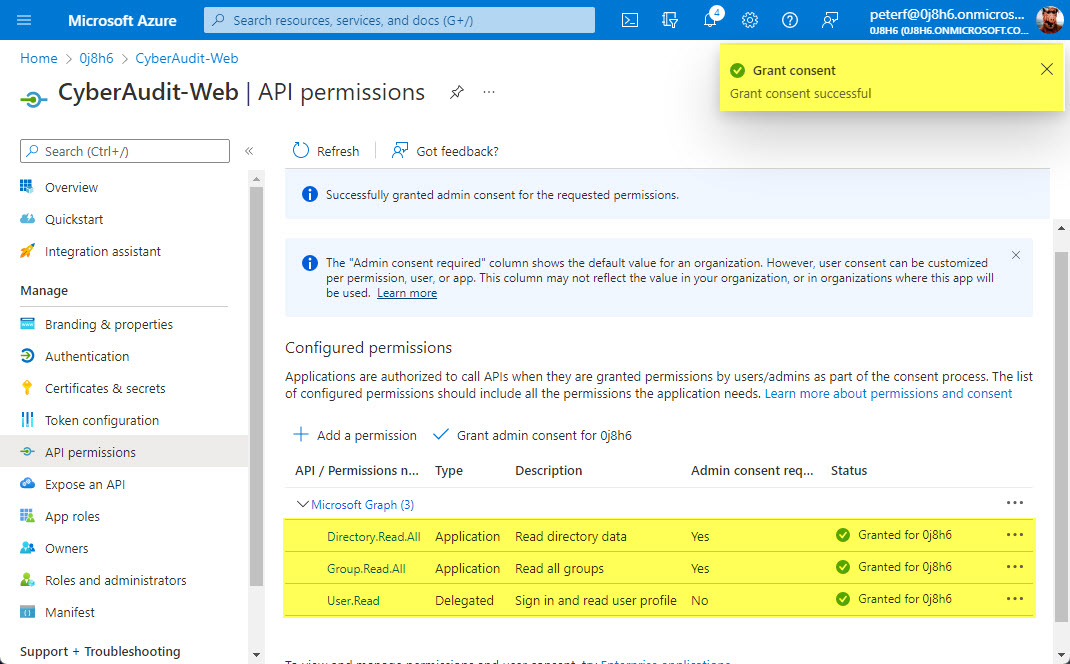
You should now have a green checkmark in the status column for all three permissions.
Confirm Settings
-
Once you have your Client ID, Tenant ID, and Secret, enter them into
CyberAudit-Web and click TEST to test and confirm your settings.